Saturday, July 27, 2013

New projects on the way!

It’s been a busy week of thrifty shopping for me.  After making that envelope pillow the other week, I was inspired to make a few more.  I took a stroll around Hancock fabrics, just to look, and walked out with a bag full of fabric and pillow forms.  Everything was on sale so I couldn’t resist.  For $65, I bought all this great stuff.


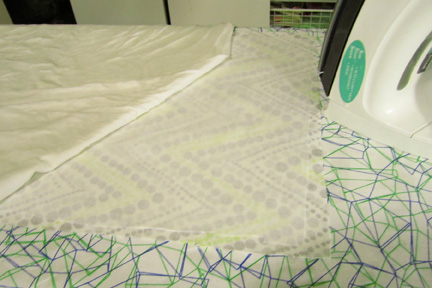
Reusing a couple old pillows I already have, and some grey fabric leftover from covering my living room walls with fabric (post on that adventure later) I have enough material to make six new pillows!  Here’s a sneak peek of my first two.  


I’ve wanted an ottoman for  a while, and with some inspiration from Pinterest, I’m going to turn this $5 Ikea Lack table I bought off Craigslist into something like this.


I don’t know what fabric I’m going to cover it with, yet, so that project is on hold until I finish a few other things.  (Like maybe buying the chair that I envision sitting next to the ottoman!)

I was staring at my bedroom wall the other day and thinking it’s a bit boring and empty looking - some diy craftyness is in need.  So it seemed like fate the next day when Michaels was having a super sale on their basic canvas - 3 canvas for the price of 1 - and I had received a 20% off everything coupon in my email that morning.  $7.50 later, I had three canvas, a 12x24 and two 12x12, and grand visions of some amazing canvas art. 


I’m going to have to ponder for a while exactly what I’m going to do.  I am definitely going to be covering the canvas with fabric, whether it’s premade or designed by me.  I’ve been really digging the Japanese sashiko patterns in my Martha Stewart Encyclopedia of Sewing and Fabric Crafts. 


They’re really graphic looking.  I’ve also been wanting to stamp fabric for curtains forever, but it takes so much fabric to make a curtain it seemed daunting.  This might be a good size to start with.  And I’ve been wanting to try my hand at applique, too!  So who knows what I’ll decide to do. Maybe I’ll do a different craft for each canvas, but in similar colors and shapes so they connect.  

Stay tuned for more diy home decor projects!

Thursday, July 11, 2013

Fabric Backed Display Cases Pt. 2

Just a quick post to show what my display cases look like up on the wall.  To learn how to make your own, see my previous post here.  On a side note,  it can be tricky to get your screws positioned perfectly on the wall (almost impossible, it seemed, for some of the boxes.)  If your having problems, try making a template of the back of your box and mark where your screws are supposed to go.  Two of my boxes came with their own templates and they were easier to put up than the ones I just measured carefully for.  Happy crafting!


Envelope Backed Pillow Cover


Here’s a quick and easy way to spruce up your living room decor.  Using leftover fabric from my fabric backed display cases  and my trusty Martha Stewart “Encyclopedia of Sewing and Fabric Crafts” book for directions, I had a new pillow on my couch in under an hour.  Here’s how to make one:


Materials:
Fabric - enough to cover your pillow form + six inches
Pillow form
Thread to match
Sewing Machine
Iron
Basic sewing supplies (scissors, measuring tape, pins, etc)


Step one:  Determine the amount of material needed for your pillow.  Measure your pillow:  Add one inch to the height for the seam allowance.  Multiply your length times 2 and add 6 inches (for the envelope part) Ex:  My pillow is 14” x 14” - my fabric is 15” x 34”.


Step two:  Using fabric chalk or disappearing ink, measure and draw your dimensions on your fabric.  I used a measuring tape and chalk to mark my dimensions and then drew my outline using a metal ruler.  Cut your fabric out.


Step three:  Place your fabric upside down on an ironing board.  Using a ruler and pins, fold your two longest sides ½” over and press with an iron.  Fold over another ½”, press again and pin to hold your hems in place.  Sew your hems ⅛” from the inner fold (3/8”  into your fabric measuring from the edge.)


Step four:  Placing your fabric face down on your work surface, fold your two hemmed edges over each other, overlapping them by 4 inches.  (See where the extra 6 inches comes in.)  Measure your square to make sure it fits your pillow dimensions.  


Step five:  Pin the top and bottom edges and sew with a ½” seam allowance.  (If your fabric has a repetitive design like mine, make sure to line up your design before pinning so it doesn’t end up off-center.)  Turn your pillowcase right side out.  Use a point turner or a pair of scissors to push your corners out.


Step six:  Insert your pillow form and enjoy!

Friday, July 5, 2013

Fabric Backed Display Cases


Inspired by fabric backed bookcases and staircases on Pinterest, I decided to cover the backs of these display cases with fabric before hanging them.  This easy project can be finished in a night, including shopping time for the materials.  I bought my fabric from Joann’s (in the home decor section.)  Always use a coupon or buy on sale!  My fabric was 50% off plus I had a 10% off coupon so it only cost me $10. My display cases were also on sale/clearance when I bought them.  Two were on clearance at Michaels and the other three I found at a thrift store.  I love thrifty shopping!


Here’s the steps to make your own fabric backed display cases:

Materials:
1 yard of fabric/combination of fabrics
Display cases
1 yard of single sided fusible interfacing, midweight
Scissors
Double sided tape - ¼” wide
Metal ruler
Exacto knife and extra blades


Step one:  Center your 1st box over your fabric so the pattern is centered.  Cut around the box, leaving about an extra inch of fabric around.  


Step two:  Cut your fusible interfacing to the same dimensions as your fabric.  I used a single sided fusible, midweight interfacing. Trim an extra ⅛” on all sides so your interfacing is smaller than your fabric. (This will keep you from accidentally ironing it to your ironing board.) 


Step three:  Set your iron to a steam setting and get your press cloth damp.  A clean white cotton t-shirt works just fine.  Follow the instructions for your fusible interfacing, but make sure you place the adhesive side face down on the wrong side of your fabric.


 Step four:  Grab your double sided tape (1/4” wide) and tape the back edge of your box.  Keep the tape about an ⅛” from the edge.  Put your fabric face up on your work space.  Line your box so your pattern is centered and straight and press firmly down to adhere the fabric to the tape.  Carefully flip your box over and smooth your fabric over the edges of your box so it’s taut and smooth.


 Step five:  Get your metal ruler and a sharp exacto knife.  Have some spare blades on hand as you need a very sharp blade to slice through the fabric.  Line your ruler up about ⅛” from the edge and carefully, but firmly run your blade along the ruler.  You should be able to cut through with one pass.  Continue on all sides and remove your excess fabric.  You may need to clean/trim frayed ends of your fabric.  If your box has metal hangers on the back, you’ll have to cut the fabric with scissors across that part, as the metal dulls the exacto knife.  You will also want to trim the fabric away from the hanger holes so you can easily hang your display boxes.


Step six:  Admire your handiwork and find a great spot to hang them. 

I”ll post pictures after I hang mine and fill them up!